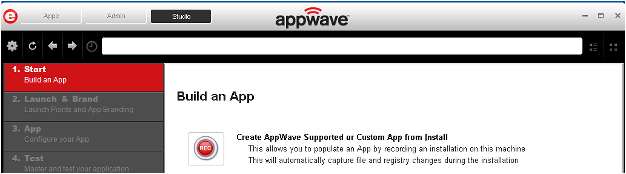
1. In the AppWave Browser click Studio and the Build an App page appears with the Start step highlighted in red.
2. Click ![]() or Create AppWave Supported or Custom App from Install and the Record Application Installation dialog appears.
or Create AppWave Supported or Custom App from Install and the Record Application Installation dialog appears.
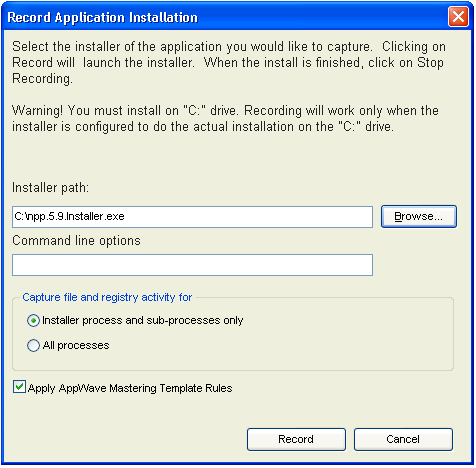
3. Browse to the path where the installer file resides. The executable must be on the “C:” drive or the recording will not work. The example above shows the NotePad++ executable.
Note: Click Install Using a Zip File if your executable is a zip file.
4. In the Command line options field, enter any command options you want to use. For information on commands, see Using the Command Line.
5. In the Capture section you can choose to record only the installer process and sub-processes, or all processes. The first option is the default setting.
6. The Apply AppWave Mastering Template Rules option is selected by default. As the process goes through the steps to create an App, warnings may be generated indicating missing data based on the template.
7. Click Record and the Recording dialog appears (typically in the upper right-hand corner of the screen). The AppWave Studio is minimized during the recording process.
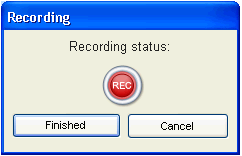
8. Follow the installation wizard for your selected App. There is no need to launch the application after the installation is complete.
9. The licensing of your App depends on what type of AppWave licensing you have purchased as well as the type of App you are creating. For a full explanation of how to license your App, please refer to: Managing Licensing.
10. Once the install process is complete, click Finished in the Recording dialog and the Record installation dialog appears.
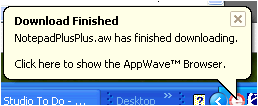
Note: An indicator window opens in the lower right-hand corner of your screen showing that the selected file has finished downloading. The file extension .aw indicates it is the AppWave Template file.
11. Click Details to see the details of the installation while it is recording or after it completes. If you want to see it after the recording is complete deselect the “Close on successful completion” option and then click Details.
12. The Record installation dialog closes automatically if you left the “Close on successful completion” option selected. Otherwise, click Finished to close the dialog. The next step that opens depends on the App you are installing.
You are then directed to complete the remaining steps to successfully master your App. The different steps are:
• The Launch & Brand page is where you select the launch executable and working folder and provide branding information for the App.
• The App page is where you can configure your App working with files, registry entries, environment variables, and required runtimes and add custom scripts to your App.
• The Test page is where you master and test before broadcasting to the AppWave.
• The Broadcast page is where you broadcast your mastered App to the AppWave.
For more information, see: Using the Start Task.