After you have installed the AppWave Browser and have mastering permission from the Administrator, click Studio to open the Start page.
1. On the Build an App page click Create AppWave Supported or Custom App from Install or click ![]() .
.
2. In the Record Application Installation dialog, browse to the ERStudio Data Architect executable (erda_XXX.exe)
Note: To download the executable for the Data Architect application click Embarcadero’s download page and select to download the trial. A 14-day trial license serial number is sent to your EDN account e-mail address.
Tip: The "Command line options" value indicates how to launch the file and the value is the trigger to run a specific command. We will not use the command line option for the creation of this App.
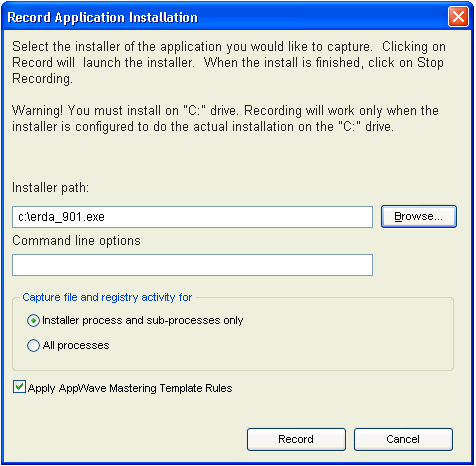
3. Leave the default setting of Installer process and sub-processes only. This option captures only the install processes instead of all the processes associated with the application.
4. Leave the default setting of Apply AppWave Mastering Template Rules. As the process goes through the steps to create an App, tasks may be created indicating missing data. This option automatically completes any missing data.
5. Click Record and the install process starts. A Recording dialog appears in the upper right corner of your screen. The blinking recording status button indicates that recording is in progress.
Note: The AppWave Browser application is minimized.
6. Follow the install steps for your selected application.
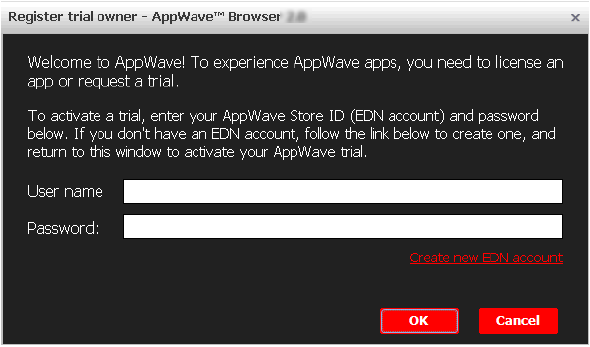
During the install process, you may be asked for licensing information. For example, if you have already installed a previous version or have a trial version, you get information regarding the status of your license. If you are installing a trial version for the first time the Register Trial Owner dialog box opens. This is where you enter your EDN user name and password to request a trial.
Note: If you do not have an EDN account, click “Create new EDN account” in this dialog.
7. Once you enter the required information click OK and the Embarcadero Product Registration opens.

8. Insert the serial number that was sent to your e-mail address. You also need to enter the DN Login Name and DN Password.
Note: The DN Login Name and Password are what you created in your EDN account.
9. Click Register and End User License Agreement for Data Architect appears.
10. Click Accept and the dialog closes.
11. Complete all the installation steps and click Finish in the Embarcadero ERStudio Data Architect dialog.
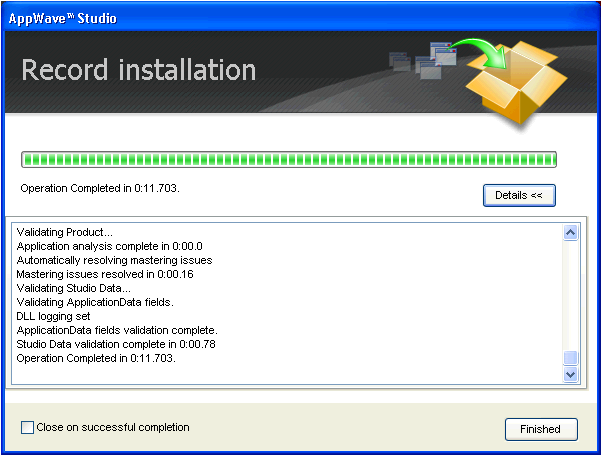
12. Then click Finished in the Recording dialog and the Record installation dialog appears. This dialog identifies everything that needs to be installed. A progress bar shows the steps being taken. The time it took to complete the operation is also displayed.
Note: To see the steps being performed during the installation click Details.
13. The step that opens next depends on the app being mastered and the information provided during the install process. The options are:
• App
• Master
14. If the Record Installation dialog does not close automatically, click Finished and the Launch & Brand page appears. This is where you select the launch executable and critical information.
15. Select Embarcadero\ERStudio Data Architect X,X\ERSTUDIO.exe from the drop-down menu.
Note: The Working Folder and Icon information fields are then automatically populated.
16. Next you will select a Product name. Click the drop-down arrow in the Product Name field and select ER/Studio Data Architect from the list.
17. If it isn’t automatically populated, enter the version in the Product Version field.
18. In the Publisher field enter Embarcadero. You can leave the default settings in the remainder of the fields.
Note: Any empty fields that are required are listed in the lower Tasks panel. An alert icon (![]() ) also appears next to the field. Click Fix on an issue and your cursor is placed in the field requiring information. Once the information is supplied the item listed in the Tasks panel disappears.
) also appears next to the field. Click Fix on an issue and your cursor is placed in the field requiring information. Once the information is supplied the item listed in the Tasks panel disappears.
19. Click Next and the Configure your App page appears. This is where you can view the changes and/or additions made to your files, registry settings, environment variables, and required runtimes. You can also edit custom scripts to run when certain app events happen.
20. Click Files to view the files that were created and placed in the working folder.
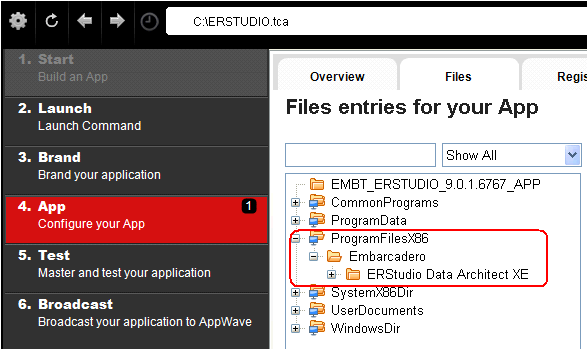
Note: For more information on this please refer to the Using AppWave Studio chapter in the Studio online help.
21. Click the Test step and the Master and Test your App page opens. Note that the output folder and file name fields are automatically populated.
22. Click ![]() and a confirm dialog appears asking if you would like to save your changes.
and a confirm dialog appears asking if you would like to save your changes.
23. Click Yes and a Confirm dialog appears. Save the file as “ERSTUDIO.tca” and click Save. The Master dialog opens and a progress bar tracks the process of mastering. It also displays the time it took to complete the operation.
24. Click Finished to close the dialog and then click Next.
Note: You can also choose to launch the mastered application at this point, but for purposes of the Quick Start we will advance to the Broadcast page.
25. In the Broadcast your application to the AppWave page leave the AppWave URL default setting.
26. There is a Task showing at the bottom of this page that requires fixing. This task is about using the Prefetch Option. Follow the steps below to complete the prefetch and mastering process.
Prefetch is the process of streaming application blocks in anticipation that those blocks are needed by an application. When you record with prefetch you can launch the application with faster start up times.
Notice that a Task appears at the bottom of the Broadcast page. This task indicates that “in order to Record the launch of the application for faster start-up time, you need to master the App from the Master tab before broadcasting. Once the launch data was recorded, remastering before broadcast will not remove this information.” Only some key blocks of application data from AppWave are necessary for the application to launch and perform basic functions.
Note: There is also an indicator next to the Broadcast step showing that there is a tasks that needs to be fixed.
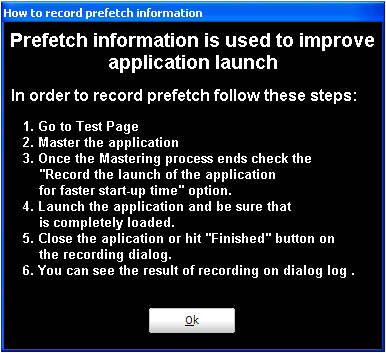
27. Click Fix and a dialog appears instructing you on how to record prefetch information. Click OK to close this dialog.
28. Return to the Master page and click ![]() . The Master dialog appears.
. The Master dialog appears.
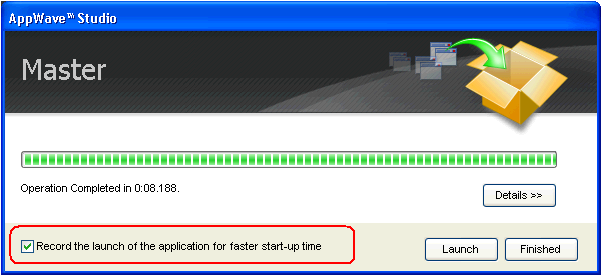
29. Select “Record the launch of the application for faster start-up time” and click Launch. This is to ensure that the application is completely loaded.
30. If an End User License Agreement (EULA) is required, it will appear at this time. Click Accept and the application opens.
Note: This application may take a few moments to open.
31. Once the application has launched, close the application or click Finished in the recording dialog.
32. Click Details to view the results of the recording.
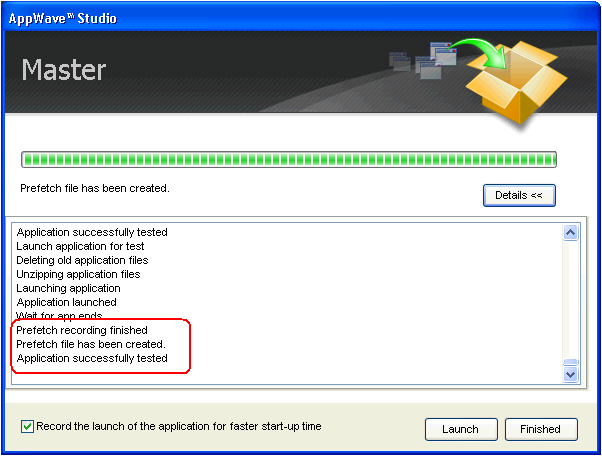
33. Click Finished in the Master dialog and then click Next to advance to the Broadcast page.
34. Click Broadcast and you are asked again to save your working file. Click Yes and the Broadcast dialog opens showing a progress bar as the app is mastered.
35. Click Finished to close this dialog.
Note: You will get a “pop-up” notification that New apps are available as well.
Once the broadcasting is complete you can return to the Apps portion of AppWave to run your application.
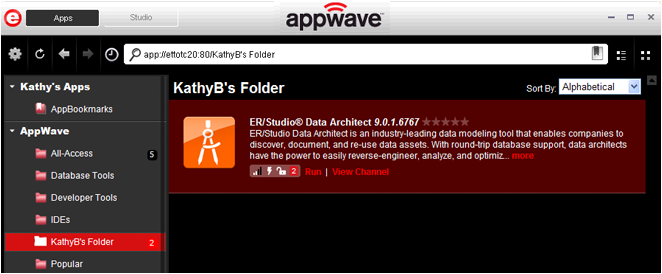
36. Click Apps to open the AppWave Browser. Then click <user’s folder> and select the ERStudio Data Architecture application from your folder in AppWave. In the following example the ER/Studio Data Architect X.X App appears in the KathyB’s folder.
37. Click Run and the End User License Agreement opens.
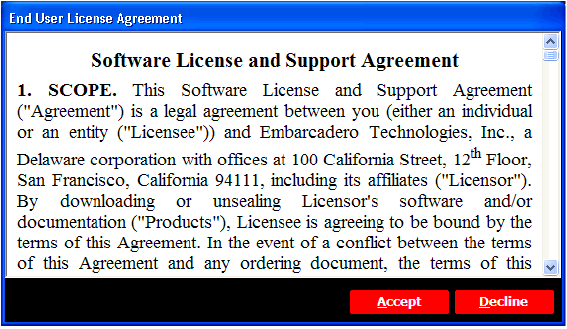
38. Click Accept and if you have more than one license type available to you, the License Selection dialog opens.

39. Select the trial license option and click OK. When loading is complete, the App opens.